January 2018: DNSCrypt has come along way in the years since my guides were written. Recently, the version 2.0 beta was released that has a huge number of new features and is very easy to install. There have also been releases of graphical interfaces and installers that make it even simpler to get up and running. I will be leaving my guides up for posterity, but I consider them deprecated at this point.
This is an update to my original article, Getting Started With DNSCrypt On Windows. With the release of version 1.4.0, it’s much simpler to install the dnscrypt-proxy service.
Note: Also see this post about using ephemeral keys.
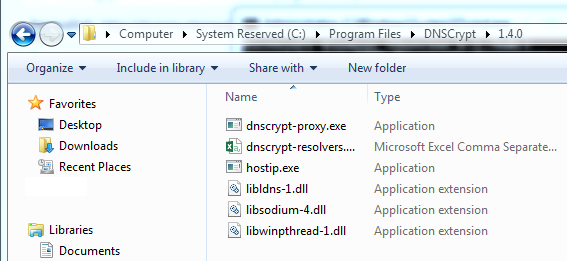
To start, download the latest version of DNSCrypt from here. At the time of writing, that would be “dnscrypt-proxy-win64-full-1.9.1.zip”. From that archive, extract the content of the bin folder; there should be six files. You can place them anywhere on your computer, but I am going to place them in “C:\Program Files\DNSCrypt\”.
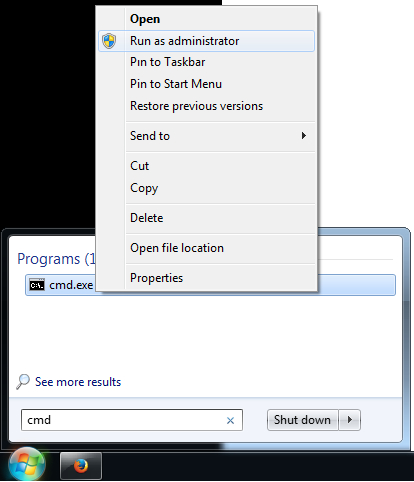
Next, open an elevated command prompt. On Windows 8.1, you can press Win-X and choose “Windows Command Prompt (Admin)”. On Windows 7, search the Start menu for “cmd”, right-click on cmd.exe, and select “Run as administrator”. From there, you should navigate to where you placed the DNSCrypt files. We do this using the “cd” command followed by the path, so in this example, you would run:
cd "C:\Program Files\DNSCrypt"From there, we prepare to install the proxy service. First, you will need to select a DNS provider. You may have noticed a file called dnscrypt-resolvers.csv that is included in the download. This contains a listing of many DNS providers that support DNSCrypt. For each provider, it has a name, description, location, and whether they support things like DNSSEC and Namecoin. It also has the necessary IP addresses and public keys. For now, pick one that you like and copy the value in the first column. We are going to use CloudNS, so the name I need is “cloudns-can”. Now that we have a DNS provider, we will test to make sure the proxy can connect using this command:
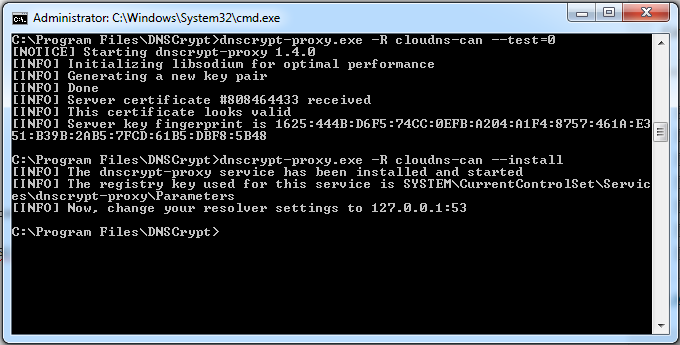
dnscrypt-proxy.exe -R "cloudns-can" --test=0If all goes well, you will get an output similar to this:
[NOTICE] Starting dnscrypt-proxy 1.4.0
[INFO] Initializing libsodium for optimal performance
[INFO] Generating a new key pair
[INFO] Done
[INFO] Server certificate #808464433 received
[INFO] This certificate looks valid
[INFO] Server key fingerprint is 1625:444B: ... :DBF8:5B48
If not, pick another name and try again. If it does work, then you can proceed to install. The command is the same except that instead of --test=0, we use --install. As of release 1.9.1, a caching plugin is also included, so we can enable that as well by adding --plugin=libdcplugin_example_cache.dll to our command.
dnscrypt-proxy.exe -R cloudns-can --plugin=libdcplugin_example_cache.dll --installYou should see something like this output to the terminal:
[INFO] The dnscrypt-proxy service has been installed and started
[INFO] The registry key used for this service is SYSTEM\Current
 ControlSet\Services\dnscrypt-proxy\Parameters
[INFO] Now, change your resolver settings to 127.0.0.1:53
As indicated, you just need to change your DNS settings to 127.0.0.1 and you will be all set (for instructions on that, you can look at the original article). For reference, here is what my terminal screen looked like after I was done:

As always, don’t hesitate to comment or send me a message if you run into any issues!

