DNSCrypt Ephemeral Keys

Normally DNSCrypt uses the same public key for each request when contacting the DNS resolver. Technically the resolver could use this to link the public key to multiple IP addresses (particularly a problem with a mobile device like a laptop or smartphone).

To help fix this, dnscrypt-proxy recently added support for ephemeral keys, which means it creates a new key pair for each request. This does add some extra CPU time to each request, but for devices that may change IP addresses a lot, it might be worth enabling. If you have a static IP, or a dynamic IP that changes infrequently, it’s probably not as useful. That being said, if there are multiple users of dnscrypt-proxy behind the same IP address, then I would think it could help mask which requests are being sent by separate users (e.g. without ephemeral keys, the DNS provider could determine that key A visits Gmail and ArsTechnica while key B visits Yahoo and the BBC).

To enable ephemeral keys, add the -E tag when installing, like so:

dnscrypt-proxy.exe -E -R cloudns-can -L "dnscrypt-resolvers.csv" --install

One Does Not Simply Fly Into Mordor

I keep seeing a theory about how Gandalf was supposedly planning on flying the One Ring into Mordor. I won’t deign to link to the article, but here is why that could never work:

The Eagles were never an option for taking the Ring to Mordor. The Eagles are never mentioned as a plan because it would be even more absurd than trying to sneak into Mordor already was. It has the same chance of success as a plan to “simply” form an army and march into Mordor.

When Gandalf is imprisoned by Saruman, he doesn’t, “think to get the eagles help him escape”. The Eagles were already looking for Gandalf due to the plan set in motion by Radagast earlier in the book. When Gwaihir went to bring the news of his findings of the Enemy’s movements to Gandalf, he obviously noticed it was more important to rescue him than to simply deliver a message. Gwaihir thus flies Gandalf to Rohan, where he gets a horse at Meduseld and rides back to Eriador to find Frodo and get aid from Elrond. Gwaihir even specifically mentions that he can’t travel a great distance with Gandalf because people are heavy and flying is hard, which is why Gandalf is only flown as far as Rohan and not all the way back to Rivendell.

Next, the creator of the theory seems to indicate that the Eagles are worried about the plan being found out and, “having to fight the Nazgûl.” Assuming he actually means Nazgûl riding on fellbeasts, they haven’t yet been revealed by Sauron, so it would be a nonissue at that point. Regardless, thinking that Sauron wouldn’t have the means to repel an incredibly obvious attempt (it’s rather hard to hide in the sky) is crazy. We read in The Hobbit that the Eagles are reluctant to go near human settlements for fear of being shot down with arrows. Well, I’m quite certain that Mordor has more archers and arrows than some small settlement in Rhovanion.

The notion that Gandalf won’t even trust Elrond with this plan is idiotic. We’ve already established that Gandalf specifically went to Rivendell to get help.

There are no orc infestations in the High Pass. As we hear, that area was kept clear by Beorn’s people. The High Pass, like Caradhras when they get to it, is infested with winter. Caradhras does not have a storm summoned by Saruman. If we accept that the bad guys can see where the Fellowship is going, how could they ever secretly turn north to head to the Eagles. This means they should have gone over the High Pass, since their turning north would give their enemies less time to prepare (since they would have to go less north). Even by the movie plot, the theory breaks down.

Finally, ‘Fly’ means flee. Unless someone is actually flying, fly means flee. Flee quickly. You can look this up in a dictionary. If you’ve read the books, you can see Tolkien use the word in this way frequently, including three sentences later, when Aragorn and Boromir, who had charged toward Gandalf’s standoff and were on the bridge, come ‘flying’ back, doing exactly what he told them to. At this point, we affirm that the writer has never read the books, and quite possibly has not touched a dictionary either.

Stewardship of Security & Privacy

The use of security, privacy, and anonymity tools are most often compromised by users who don’t understand operational security (“opsec”), the methods and discipline of using the tools. You can give the best hardware and software in the world to someone without teaching them about the risks, and you may as well not given them anything at all. The fact is, security and privacy are caretaking activities — not scary things, but stewardship.

In our post-Snowden world with increased awareness among the general public — though one might argue there has not been enough awareness even still — it’s more important than ever to spread the basic philosophy and practices behind keeping oneself safe when using our increasingly connected devices, particularly our mobile phones. You are only as secure as others in your circle, so what we should be cultivating is a community of awareness. Like driving or swimming, security is something we need to practice, responsibly, within the shared community space of the Internet. However, we shouldn’t think of it as the sole purpose or focus when using our mobiles any more than avoiding an accident is the purpose of driving, or avoiding drowning is the purpose of swimming.

Our mobile devices are progressively becoming integral extensions of our personal, financial, educational, and work lives. Even the US Supreme Court said so in a recent ruling , stating that, “Modern cell phones, as a category, implicate privacy concerns far beyond those implicated by the search of a cigarette pack, a wallet, or a purse.” So we need to learn a little mobile safety just as much as water or driver safety.

Another important point is that while people might freak out about the [GCHQ/NSA/BND], but you should be more worried about some 13-year old kid from eastern Europe hacking your phone and making off with your account data, financial info, address book, and anything else that will enable them to wreak havoc on your life from afar. That’s your typical daily threat, and if your phone is hacked, everyone you know becomes a potential target too. So it’s hygiene; take care of your own leaks and help the people around you take care of theirs.

But don’t go preaching the small, techie details. Keep it simple and easy to grasp. It won’t be perfect to start with, because it will involve putting people well outside their comfort zone for something they may not even care that much about. It will be a start though, and sometimes that’s the best we can ask for — getting our friends and family to take control of their own privacy and security. That’s our job, painting the metaphors. Less boring, more fun and bravery. More taking care of yourself and others. Retrofitting internet communications for anonymity and privacy-by-design is a brave and vain task, after all. It wasn’t designed for it at the protocol level, but it’s demanded by the times.

Avatar Obfuscation in WordPress

By default, the generated avatars used in WordPress come from Gravatar and are based on the commenter’s e-mail address. While this means that users can have a customized avatars that follow them across the web, it does prove to be a privacy risk even for people that don’t sign up for the service. Fortunately, the function that fetches avatars in WordPress is easily overridden with a plugin, so I wrote a very simple one that lets you specify a salt to append to e-mail addresses before they are hashed and submitted to Gravatar.
avatar-settings-page
It comes with a simple settings page that lets you specify the salt value. One feature that would be nice to add is some way to whitelist registered users or let commenters specifically override the filter on their comment(s), but that’s beyond my time commitment right now (so pull requests welcome!).

Avatar-Obfuscation on GitHub

DNSCrypt On Windows

January 2018: DNSCrypt has come along way in the years since my guides were written. Recently, the version 2.0 beta was released that has a huge number of new features and is very easy to install. There have also been releases of graphical interfaces and installers that make it even simpler to get up and running. I will be leaving my guides up for posterity, but I consider them deprecated at this point.

This is an update to my original article, Getting Started With DNSCrypt On Windows. With the release of version 1.4.0, it’s much simpler to install the dnscrypt-proxy service.

Note: Also see this post about using ephemeral keys.

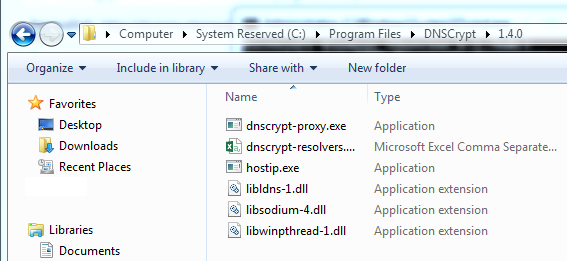
To start, download the latest version of DNSCrypt from here. At the time of writing, that would be “dnscrypt-proxy-win64-full-1.9.1.zip”. From that archive, extract the content of the bin folder; there should be six files. You can place them anywhere on your computer, but I am going to place them in “C:\Program Files\DNSCrypt\”.

dnscrypt-0

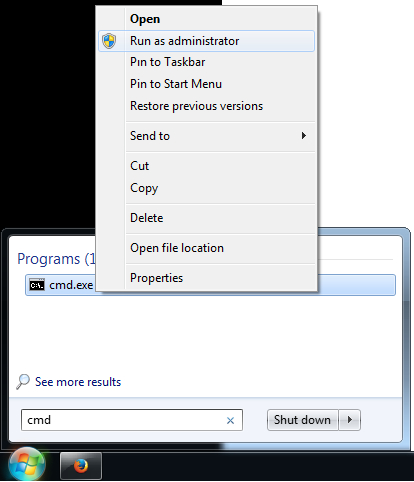
Next, open an elevated command prompt. On Windows 8.1, you can press Win-X and choose “Windows Command Prompt (Admin)”. On Windows 7, search the Start menu for “cmd”, right-click on cmd.exe, and select “Run as administrator”. From there, you should navigate to where you placed the DNSCrypt files. We do this using the “cd” command followed by the path, so in this example, you would run:

cd "C:\Program Files\DNSCrypt"

elevated_command_prompt

From there, we prepare to install the proxy service. First, you will need to select a DNS provider. You may have noticed a file called dnscrypt-resolvers.csv that is included in the download. This contains a listing of many DNS providers that support DNSCrypt. For each provider, it has a name, description, location, and whether they support things like DNSSEC and Namecoin. It also has the necessary IP addresses and public keys. For now, pick one that you like and copy the value in the first column. We are going to use CloudNS, so the name I need is “cloudns-can”. Now that we have a DNS provider, we will test to make sure the proxy can connect using this command:

dnscrypt-proxy.exe -R "cloudns-can" --test=0

If all goes well, you will get an output similar to this:


[NOTICE] Starting dnscrypt-proxy 1.4.0
[INFO] Initializing libsodium for optimal performance
[INFO] Generating a new key pair
[INFO] Done
[INFO] Server certificate #808464433 received
[INFO] This certificate looks valid
[INFO] Server key fingerprint is 1625:444B: ... :DBF8:5B48

If not, pick another name and try again. If it does work, then you can proceed to install. The command is the same except that instead of --test=0, we use --install. As of release 1.9.1, a caching plugin is also included, so we can enable that as well by adding --plugin=libdcplugin_example_cache.dll to our command.

dnscrypt-proxy.exe -R cloudns-can --plugin=libdcplugin_example_cache.dll --install

You should see something like this output to the terminal:


[INFO] The dnscrypt-proxy service has been installed and started
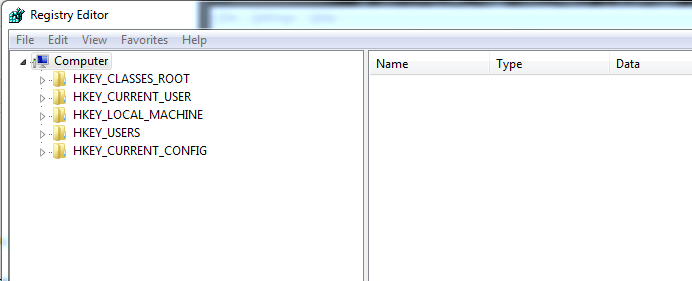
[INFO] The registry key used for this service is SYSTEM\Current
 ControlSet\Services\dnscrypt-proxy\Parameters
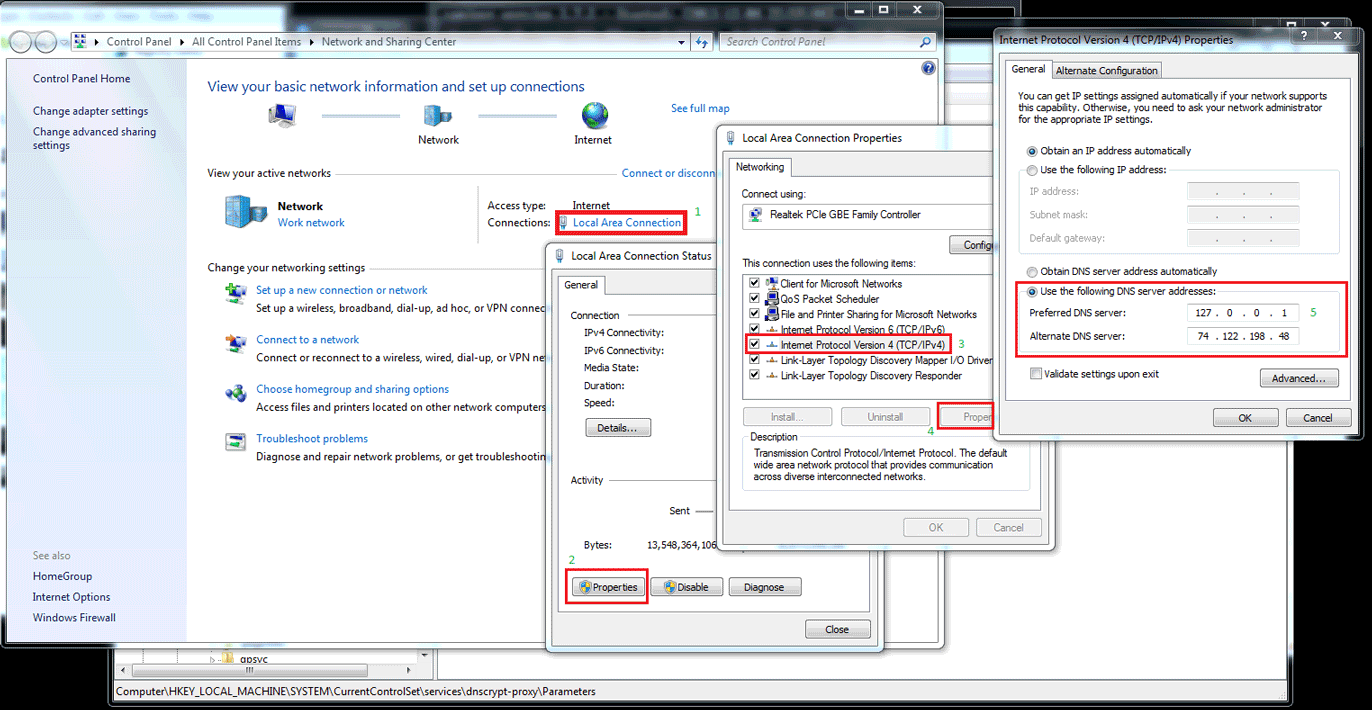
[INFO] Now, change your resolver settings to 127.0.0.1:53

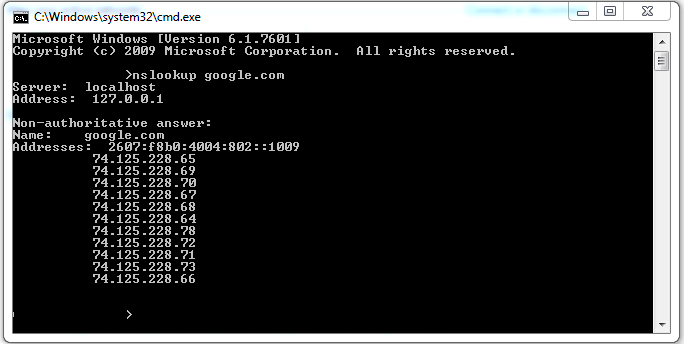
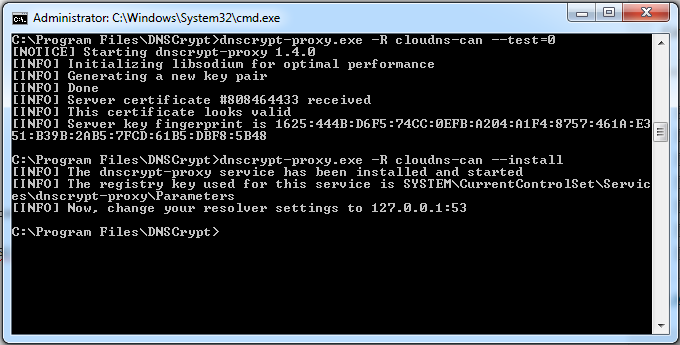
As indicated, you just need to change your DNS settings to 127.0.0.1 and you will be all set (for instructions on that, you can look at the original article). For reference, here is what my terminal screen looked like after I was done:
dnscrypt-full

As always, don’t hesitate to comment or send me a message if you run into any issues!

Getting Started With DNSCrypt On Windows

DNSCrypt is a new protocol for DNS queries, placing authentication onto regular lookup traffic. DNSCrypt helps prevent DNS spoofing using elliptic-curve cryptography to verify that responses haven’t been tampered with in transit. While queries are technically encrypted, DNSCrypt only guarantees authentication and not confidentiality. Nothing prevents the resolver from logging and often request/response sizes and timestamps are enough to fingerprint a user.


1. Download dnscrypt-proxy

This application is provided by dnscrypt.org and can be downloaded here. As of the time of writing, the latest version is 1.3.3. Since this guide is for Windows, download dnscrypt-proxy-win32-1.3.3.zip.

2. Extract dnscrypt-proxy
Open your downloaded file and extract the contents to your installation location; I placed them in C:/Program Files/DNSCrypt. There should be three files: dnscrypt-proxy.exe, hostip.exe, and libsodium-4.dll.

3. Install the service
Open the location of your dnscrypt-proxy.exe and Shift + right-click somewhere in the folder. In the menu, choose “Open command window here”. In the command line that opens up, type:

dnscrypt-proxy.exe --install

This will install the service, meaning you won’t need to start the program every time you restart your computer. Should you ever want to remove the service, follow the same steps as above but instead type:

dnscrypt-proxy.exe --uninstall

4. Setup the DNS provider in the registry
The dnscrypt-proxy service will read settings from the Windows registry. For this guide, we will use the CloudNS resolvers. To do this, first we will open the registry editor by opening the start menu and searching for “regedit.exe”. Open it and you should see something like this: registry
Note: Be very careful about editing things in the registry. You can mess up your computer badly.

Now we need to find this particular entry:
HKEY_LOCAL_MACHINE\SYSTEM\CurrentControlSet\services\dnscrypt-proxy\Parameters
It’s fairly straightforward to get to, just click through as if they were regular folders. You might need to create the Parameters key – if so, just right-click in the dnscrypt-proxy entry, choose New–>Key, and name it “Parameters”.
After this we set up the actual options for the proxy by creating subkeys as you can see in this screenshot:

dnscryt_settings

For each subkey, right-click and choose New–>String Value and type in the name of the setting. Then double-click the new subkey and type in the desired value. Here are the settings I used:
LocalAddress 127.0.0.1
ProviderKey 1971:7C1A:C550:6C09:F09B:ACB1:1AF7:C349:6425:2676:247F:B738:1C5A:243A:C1CC:89F4
ProviderName 2.dnscrypt-cert.cloudns.com.au
ResolverAddress 113.20.6.2:443

5. Change your connection settings
These are the basic settings we need. Now we can close the registry editor and change the network settings in Windows to use the IP address we specified in the registry (which in this case is 127.0.0.1).
change dns settingsYou can click for a bigger image.

Basically, just follow my MS-Paint guide above to set your DNS server to be your new proxy. The alternate DNS server can be whatever other DNS server you want to fall back on. I use one from the OpenNIC project. After you’re done, restart your computer and flush your DNS cache by opening a command line like we did earlier (it’s easiest to just Shift+right-click on the desktop) and type the command:

ipconfig /flushdns

Now you should be ready to go! If you want to test that everything is working, type this at the command line:

nslookup google.com

The output should look something like this:
nslookup

If you run into any problems, leave a comment or send me a message!